Home > Assemble a PC > Create USB
How to Create a Bootable USB for Windows 10/11
Published: February 26, 2023
If you’re manually downloading Windows 10 or 11 to your own USB flash drive, in order to install Windows on a fresh new custom PC build, this guide will explain how to do it step by step. This is the cheapest way to get Windows 10 or 11 up and running on a new computer, as you don't have to buy a Windows license (product key) straight away and you can just do it at a later time.
Until you activate Windows by buying a product key, your PC will still be 100% functional without any limitations, and the only downside is you'll see a watermark image in the bottom right of your screen reminding you to upgrade until you do (but the watermark disappears when gaming).
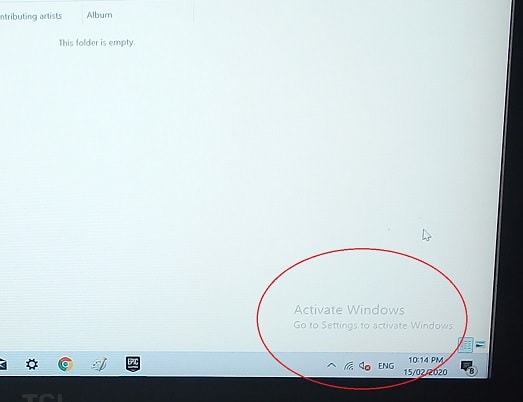 The watermark you'll see until you enter a product key
To create a bootable USB drive for installing Windows 10/11 on a new PC build, you'll need a blank USB flash drive that's 8GB or bigger, and you need access to a desktop or laptop. You can do this on a Windows PC or Mac, but in this guide I'll explain how to do it on a Windows PC only. Let's get into the steps.
1. Prepare USB Drive
Insert the USB drive into your computer, and clear all data on it by formatting it. You want the drive to be blank. Do this even if it's a brand new drive. To format a USB drive, simply right click on the drive in your main computer or devices folder and click format.
2. Download Windows
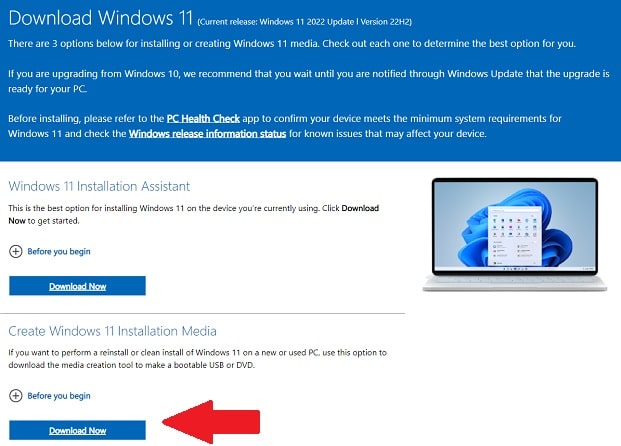
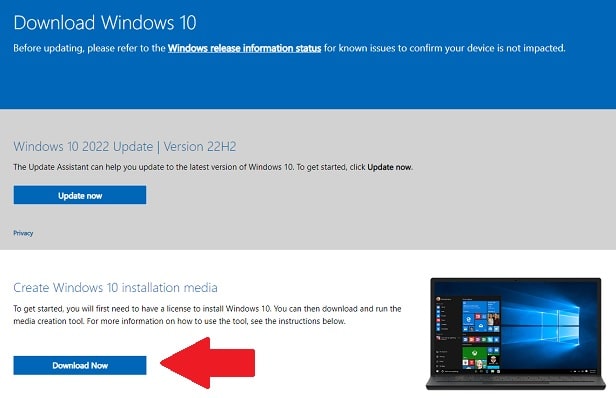
Now you need to download Windows from the official Microsoft website, so that you can then transfer it to the USB drive.
On either page, click on the "Download Now" button under the "Create Installation Media" section. The download may take a few hours depending on your internet connection speed.
3. Run Media Creation Tool
Once the download is complete, if the tool doesn't automatically run then go to your downloads folder and run the tool. Accept the terms and conditions, and then select that you want to create installation media. Then select the language, edition, and architecture of Windows that you want to use. Most people will be fine using Windows 10/11 Home edition, and for the architecture make sure you select 64-bit (unless you know that you need to use 32-bit).
Now on the next screen choose USB flash drive as the type of media you're using, and then make sure the correct flash drive is selected on-screen. Then let the process finish and you're done - it could take a while for it to finish up. After it's finished, you can remove your USB drive and move onto installing Windows on your new system.
4. Insert USB in New PC
Once you've created your bootable USB drive with Windows on it, insert the drive into a USB 3 or USB 2 port on your new computer (depending on whether you have a USB 2 or USB 3 flash drive). USB 3 ports should be physically color-coded in blue.
Then reset/turn-on the computer. If the Windows installation steps come up on-screen, proceed to install Windows as explained in the guide on what to do after building a PC. If it doesn't come up on screen, you need to change the boot drive of the PC so that it boots up from the USB drive. How to do that is also explained in that guide I just linked.
During the installation of Windows it will ask you for a product key, but you can still proceed if you select the option to enter your product key later on. In your own time, buy a product key from the Microsoft site or elsewhere (just do your research to make sure it's a legitimate key).
Trusted VPN
VPN software can be important in this day and age, especially if you do lots of online banking and/or use public WiFi while travelling. Having a VPN adds an extra layer of security to your PC or laptop when online to help protect your data, passwords, financials, etc from hackers or malicious programs. It can also let you access region-locked content (eg US Netflix from overseas). There are also benefits for gaming.
Because they're so popular these days, there are countless VPN providers, and it can be confusing to pick one. If you want my 2 cents, after a lot of research I decided on NordVPN 'cause it's one of the fastest, most reliable VPNs for both gaming and general use, with a lot of credible reviews out there backing that up.
Popular Articles (see all)
Search the Site
About the Author (2026 Update)
I'm an indie game dev working on my first release, an immersive VR stealth FPS coming to Steam soon. Researching, writing, and updating this site helps a little with self-funding the game's development.

I don't put ads everywhere like most tech blogs, as I find it a bad user experience, so this site is 100% reader supported: if you found the many guides on the site useful and want to help support the many hours of work that has gone into creating and maintaining them, if you make a purchase on Amazon after using any of the Amazon links on this site, I earn a tiny cut of the total sale at no extra cost to you. I also accept donations if feeling generous. Hope the site helped a little.
My Amazon Storefront (my most recommended products)
Amazon Home Links:
 |
 |
 |
 |
|
ABOUT BGC Helping you build better systems for less, here at Build-Gaming-Computers.com you'll find simultaneously comprehensive yet simplified guides and tutorials, including updated PC build recommendations. Always as objective and unbiased as possible, with no AI generated content, and little to no ads.  |
Intro | Best PC Builds | Best Tools | PC Assembly | Prebuilt PCs | My Amazon Store | Privacy | Contact | Archives | Blog

Copyright (C) 2006-2026 Build-Gaming-Computers dot com All Rights Reserved
As an Amazon Associate we earn from qualifying purchases
For the Love of Gaming + Flawless Frame Rates