Home > PC Assembly > Install Motherboard
How to Install Motherboard in Case (Step by Step)
A Simplified 4-Step Motherboard Installation Guide for Beginners (& Photos)
Time to learn how to install a motherboard into your case, and you're in good company because this tutorial will explain everything you need to know in an easy-to-understand way with clear, large accompanying photos and diagrams of our own motherboard installation to make things easy to understand. Once you install your motherboard, your new PC build will finally start to look like it means business.
If you're following this motherboard installation guide as part of our full PC assembly guide, by now you should have already installed the CPU, CPU cooler, and RAM onto your motherboard. You could install these parts after your motherboard is installed in the case if you wanted to, but we find it easier for most builds to install these parts before as you have much more control and ease of access when your motherboard is outside the case.
How Hard is it to Install a Motherboard?
Not very; learning the steps to install a motherboard into a computer case isn't hard, but there are a few things to know throughout the process including how to install standoffs properly which we'll explain in detail throughout this walkthrough which shows our own micro ATX motherboard installation as an example.
Don't worry if you're installing a different sized motherboard such as a standard ATX, mini ITX, or eATX instead though, as the steps to installing a motherboard in a case is the same and we'll explain everything in a way that's applicable to any PC build.
Before proceeding, just remember to ground yourself by touching a metal object before handling your parts (if you're not using anti-static equipment for your PC build). Also, avoid touching any circuitry on your motherboard, and handle it by the edges only. Let's do this.
Steps to Installing a Motherboard:
1. Install Motherboard IO Shield in Case
2. Find Where to Install Motherboard Standoffs
3. Install Motherboard Standoffs in Case
4. Install Motherboard Onto Standoffs
1. Install Motherboard IO Shield in Case
The first step to installing a motherboard into your computer case is to fit the metal backplate, also called the IO Shield (Input Output Shield), which you need to install in the back of your case. This backplate is used to protect the rear of your motherboard, and it has cutouts for the rear connections on your board. Some motherboards, usually higher-end models, already have a backplate/IO shield attached to the motherboard such as the Asus ROG Strix B450-F:
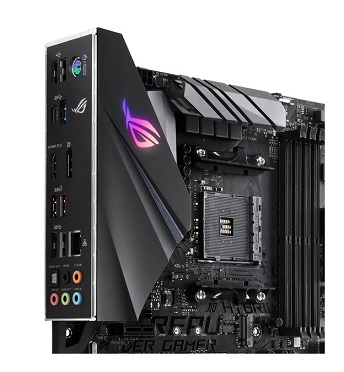
Some motherboards already have the IO shield pre-installed
If your motherboard already has a pre-installed backplate, you can skip ahead to step 2 of these motherboard installation steps, otherwise keep reading to learn how to fit your motherboard's backplate properly. To gain easier access to the inside of your case, I'd recommend laying it on its side. Now, go grab your backplate from your motherboard box which will look something like this:
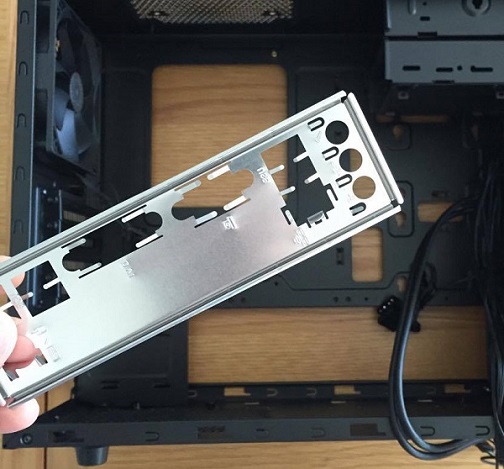
Before installing your motherboard in the case, you must fit the IO shield in place
The backplate will only fit the one way around, and for most motherboards it's with the mouse and keyboard connections on top and the on-board audio ports on the bottom (that's if your motherboard also still has PS/2 mouse/keyboard inputs like ours does here; who still uses these peripheral connections I have no idea ;p).
As well as only having one way up, there's also only the one spot in your case where you can install the backplate, so it won't be hard to find where it fits. Look for an opening in the rear of your case which is the same size as your backplate. Now, you want to put the backplate into place from the inside of your case. It'll have small clips or protrusions around the edges to help it clip into place - push on all 4 corners until you hear it snap into place.
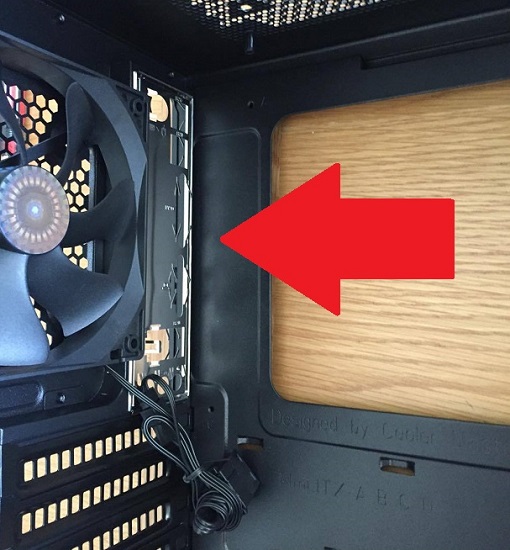
Push in the 4 corners of the IO shield from within your case (not from outside)
To make sure the backplate is properly and securely fitted, give it a slight push from the outside of your case as well to get a feel for whether or not it's firmly secured. That's your motherboard IO shield all done and installed, so let's move on.
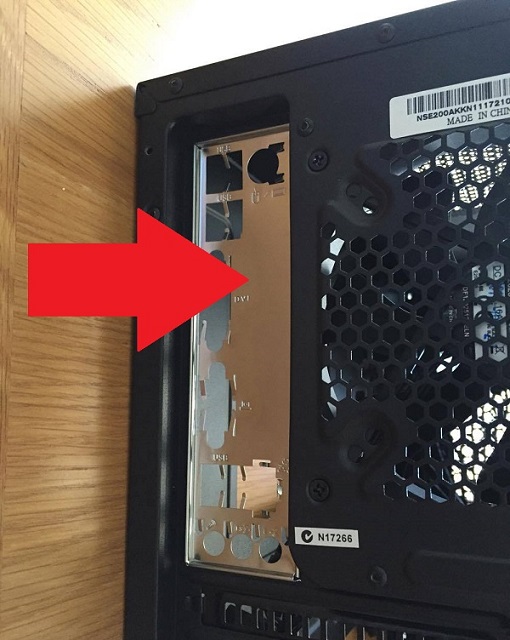
Push the backplate from the outside to ensure it's properly seated
2. Find Where to Install Motherboard Standoffs
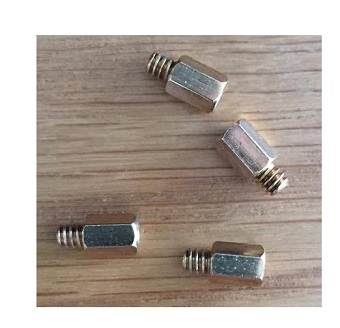
Once the backplate is properly fitted into your case, before you actually fit the motherboard into your case there's another step to handle - installing the motherboard standoffs.
What Are Motherboard Standoffs?
The standoffs, also called risers or spacers, are double-threaded pegs that hold the motherboard securely in place, as well as keeping a little distance between your motherboard and case which is crucial to avoid shorting out the motherboard (and it also helps cooling).
Do All Cases Come With Standoffs?
The majority of computer cases will come with standoffs for mounting your motherboard, and many cases also have them pre-installed. Some cases have some standoffs pre-installed, with extra standoffs in a bag for you to manually install, as standoffs can be fitted in different holes depending on your motherboard size. For example, where you install the standoffs in the case will be different for standard ATX-sized motherboards compared to say, micro ATX motherboards.
My Case Didn't Come With Standoffs (or Enough Standoffs)
In the rare case (pun intended) that you don't get the amount of standoffs you need with your case, you can buy some more for cheap and they're pretty universal so just buying any ATX standoffs should be just fine (unless your case is really strange and would need a different type). These are the ones I'd get in the rare chance I'd have to buy some:
StarTech Motherboard Standoffs for ATX Computer Case (15 Pack)
Gather Your Standoffs
Look inside the bottom of your case (if it's lying down) for any pre-installed standoffs, and gather any extra standoffs you have that came in a bag with your case. For the Cooler Master N200 case for our example PC build here, there's 2 standoffs pre-fitted, with more in a bag for us to install:
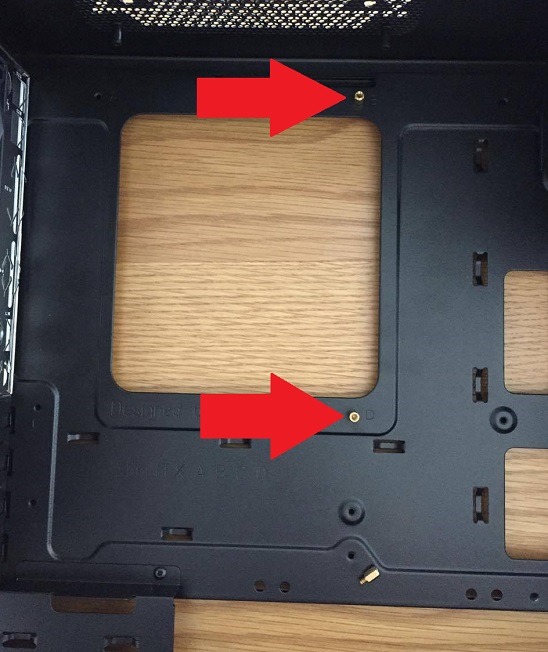
Our case has 2 pre-installed standoffs
Different motherboard sizes will require you to install the standoffs into different holes, with bigger motherboards requiring more standoffs than smaller ones. Installing a microATX motherboard typically requires 6 standoffs, with standard ATX motherboards usually needing 9.
So, what you want to do first before actually installing any standoffs is get an idea of where you need to install them for your particular case and motherboard - unless they've all been pre-installed in the case. Carefully lower your motherboard inside the case for a test-run to see which holes in your case you need to install standoffs. In other words, match all the holes on your motherboard with holes in your case - that's where you need standoffs installed.
When doing this, remember to hold your motherboard by its edges, and ground yourself before picking it up. Then place your motherboard aside safely for now, resting it on your motherboard box or on a clean, non-conductive surface.
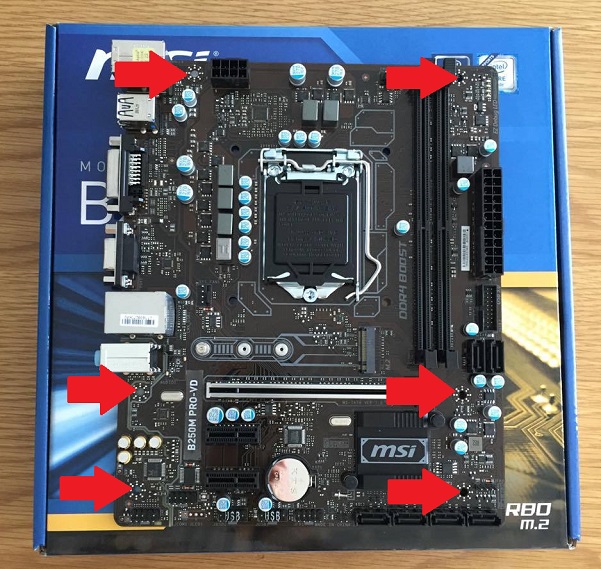
The holes on the motherboard we need to match up to the case standoffs
How Many Standoffs Do You Need to Use?
Generally speaking, you want to use as many standoffs as there are mounting holes in the motherboard, so that your motherboard will be fully secured in the case. But sometimes a motherboard will have mounting holes that doesn't line up with standoff holes in your particular case. If that's the case for you (pun intended) then don't install standoffs there, as it's okay to not screw in every single mounting hole that your motherboard has, so long as your board is still well-secured and fully lifted off the case without any contact.
For example, if you're installing a mATX (micro-ATX) motherboard like we are here, there might be 6 available mounting holes on your board (like ours), but if you can only match-up and install 4-5 with your case then you should be just fine. Also, if your case already has a pre-installed standoff that you can't match up to a mounting hole on your motherboard, you'll want to remove that standoff.
3. Install Motherboard Standoffs in Case
To install your standoffs, you're going to need to use a standoff socket attachment that should have come with your case. You attach this socket to the top of each standoff to be able to screw them in one at a time with your screwdriver. This is assuming you have metal/brass standoffs like most cases do - if you have older plastic standoffs instead, you might be able to just push them in like pegs (with your hands) without any screwing required.
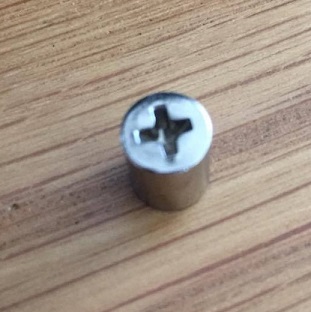
Use a standoff socket attachment to screw in standoffs
So, go ahead and screw the standoffs into your case using the socket attachment:
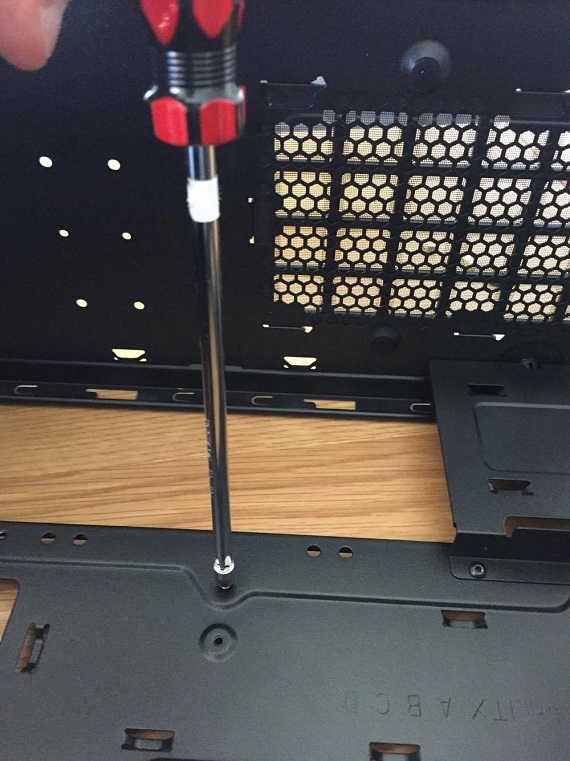
Screw in the standoffs you need to install for your particular motherboard
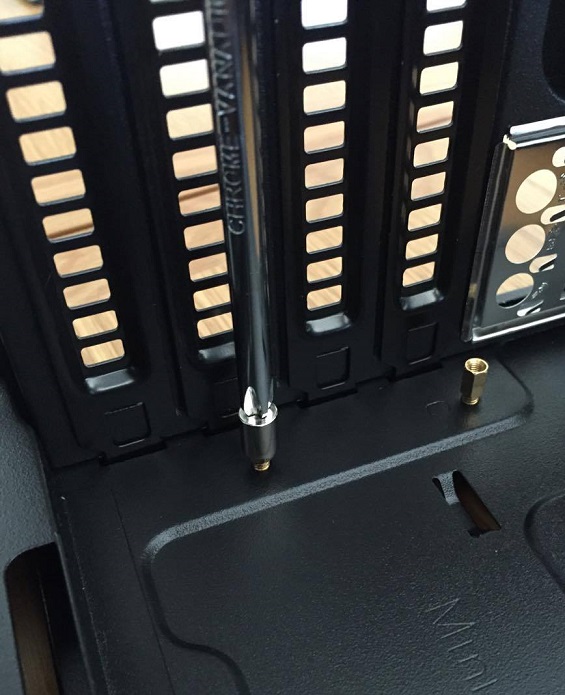
Use the socket attachment to be able to screw the standoffs
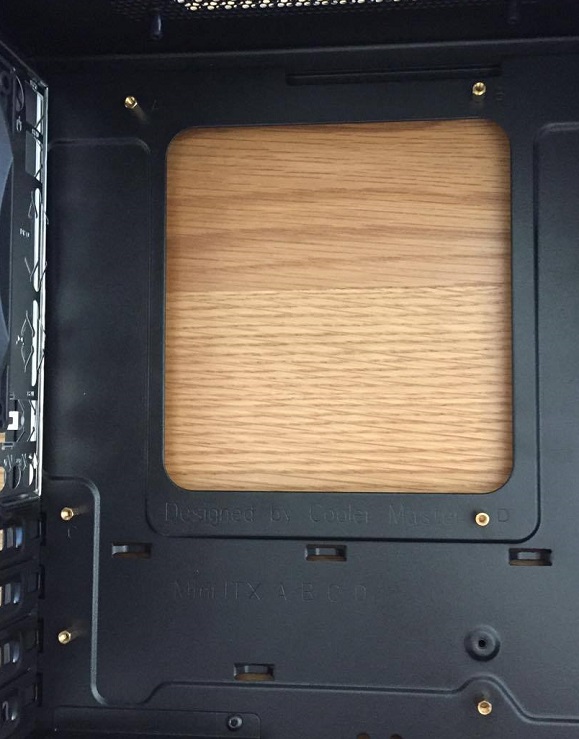
Our 6 golden standoffs of glory all done and ready to welcome the landing of our mothership
4. Install Motherboard Onto Standoffs
Now get your motherboard (ground yourself first) and carefully lower it so that the rear connections/ports fit into the corresponding ports on the backplate that you installed earlier, also making sure that each standoff fits into the holes on the board. Aligning the board properly might require you to gently force the motherboard against the backplate.
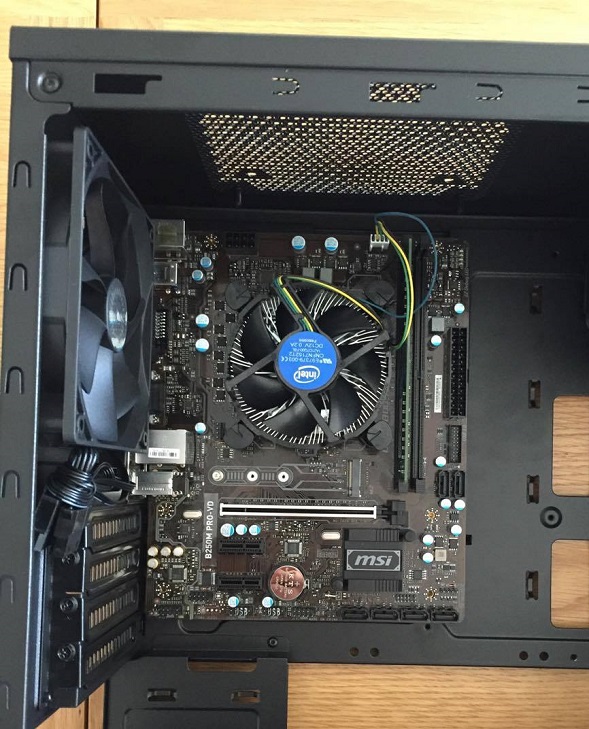
Lower the motherboard onto the standoffs while simultaneously aligning it with the backplate
Look through the back of the case at your motherboard backplate to ensure the ports all line up properly. Once the board is in place, grab the motherboard screws which are labelled as “M3x5” screws in our case's manual and screw them in, being careful NOT to over-tighten them.
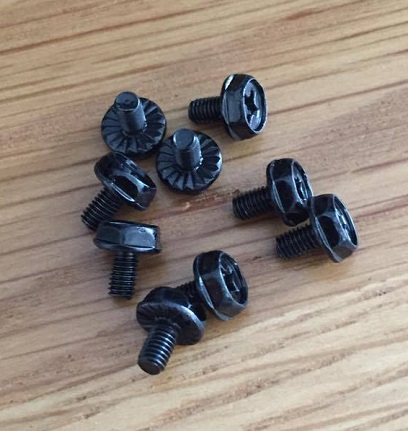
Grab your motherboard screws
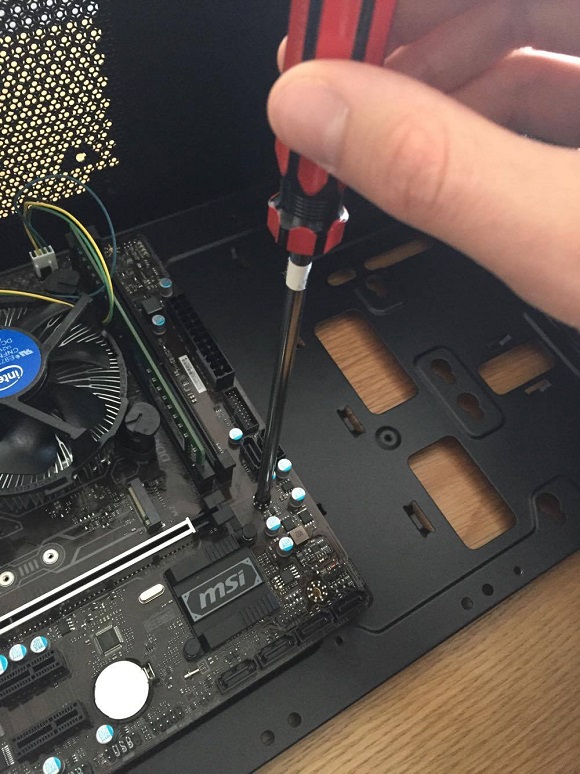
Put the screws in and tighten them securely but not TOO tight. Just a tad tight.
That's pretty much it for physically installing a motherboard into the case, but now you need to connect the cables which we cover in our full PC building guide.
Trusted VPN
VPN software can be important in this day and age, especially if you do lots of online banking and/or use public WiFi whilst travelling. Having a VPN adds an extra layer of security to your PC or laptop when online to help protect your data, passwords, financials, etc from hackers or malicious programs. It can also let you access region-locked content (eg US Netflix from overseas). For gamers their can be even more benefits to using a VPN.
Because they're so popular these days, there are countless VPN providers, and it can be confusing to pick one. If you want my 2 cents, after a lot of research I decided on NordVPN 'cause it's one of the fastest, most reliable VPNs for both gaming and general use, with a lot of credible reviews out there backing that up. They also quite often run very solid deals.
Popular Articles (see all)
Search the Site
About the Author (2025 Update)
I'm an indie game developer currently very deep in development on my first public release, a highly-immersive VR spy shooter set in a realistic near-future releasing on Steam when it's ready. The game is partly inspired by some of my favorites of all time including Perfect Dark, MGS1 and 2, HL2, Splinter Cell, KOTOR, and Deus Ex (also movies like SW1-6, The Matrix, Bladerunner, and 5th Element).
Researching, writing, and periodically updating this site helps a little with self-funding the game as I earn a few dollars here and there from Amazon's affiliate program (if you click an Amazon link on this site and buy something, I get a tiny cut of the total sale, at no extra cost to you).
Hope the site helps save you money or frustration when building a PC, and if you want to support the countless hours gone into creating and fine-tuning the many guides and tutorials on the site, besides using my Amazon links if purchasing something, sharing an article on socials or Reddit does help and is much appreciated.

