Home > Assemble a PC > AMD Stock Cooler
How to Install AMD Stock Cooler (Wraith Stealth)
Installation Guide for the AMD Wraith Stealth (Comes With Some AM4 & AM5 CPUs)
Published: February 21, 2023
If you need help learning how to install the Wraith Stealth cooler, which is a popular stock cooler that comes with many AMD CPUs, this step by step guide will make it easy. Before continuing make sure you're aware of basic safety precautions when working on the inside of a computer, mainly that you need to ground yourself by touching metal before handling any PC components (or wearing an anti-static strap if you want to really be on the safe side). See the main PC assembly steps if you need more details, otherwise let's get straight into the AMD stock cooler installation steps.
Oh and for now just keep your CPU cooler in its plastic packaging for now until you're ready to install it. Don't take it out and rest it directly on your table/work space because there is thermal paste pre-applied underneath the cooler and you don't want to smudge it or get dust on it.
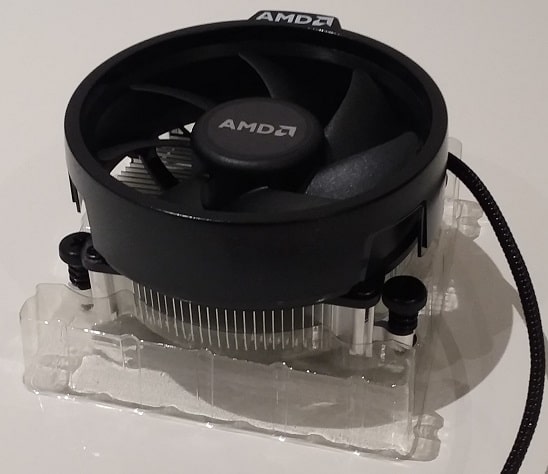 Keep the stock AMD cooler in its packaging for now
1. Ensure CPU is Installed Properly (and Top is Clean)
Before installing the stock AMD cooler, make sure your processor is properly seated in the CPU socket and the socket is locked (the small retention arm must be all the way down and horizontal to the motherboard).
Related: CPU Installation Steps
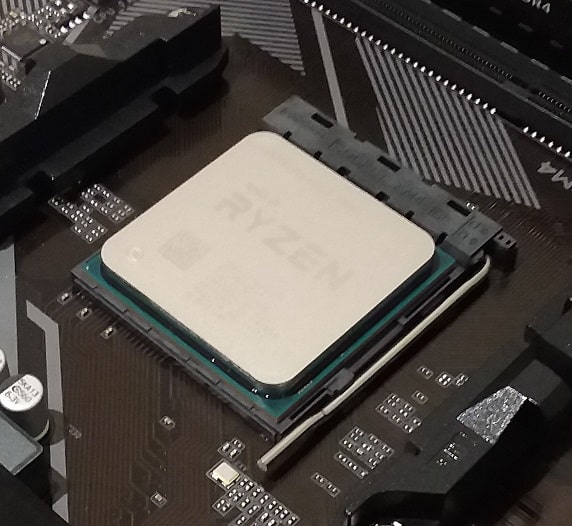 Ensure CPU is properly seated in socket and locked into the place
If you're installing the Wraith Stealth cooler into an existing desktop computer, and you previously removed the old CPU cooler, make sure the top of the CPU is clean of any old thermal paste (or general dust and debris). Use a lint-free cloth and isopropyl alcohol if you need to wipe off any thermal paste residue from the previous cooler.
Speaking of paste, there is no need to apply thermal paste yourself when it comes to installing stock AMD coolers such as the Wraith Stealth as they already come with thermal paste pre-applied to the bottom:
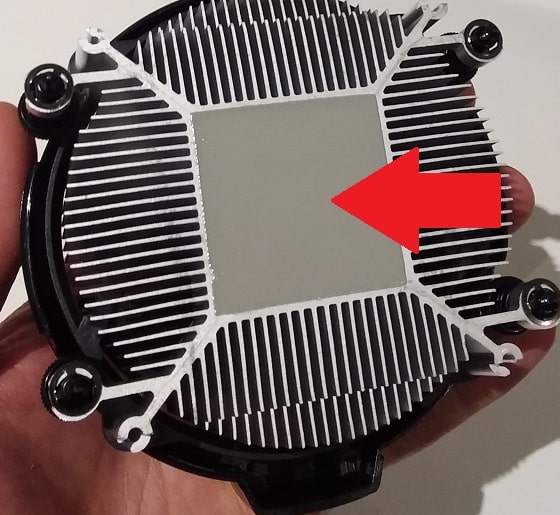 The pre-applied thermal paste on the Wraith Stealth
If you bought a second-hand Wraith Stealth cooler that's already been used, it may not have pre-applied paste in which case you will need to apply thermal paste yourself.
2. Remove AMD Mounting Brackets
Unlike the Wraith Prism cooler which requires mounting brackets for installation, the Wraith Stealth cooler needs to be mounted directly onto the motherboard (without the brackets). Check your motherboard for the presence of the following 2 brackets pictured below, and if you have them on your board you will need to remove them:
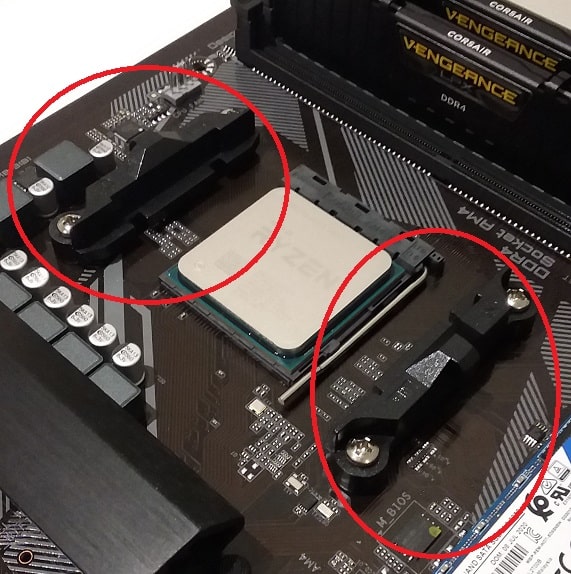 To install a spring-screw cooler like the Wraith Stealth, these brackets need to be removed
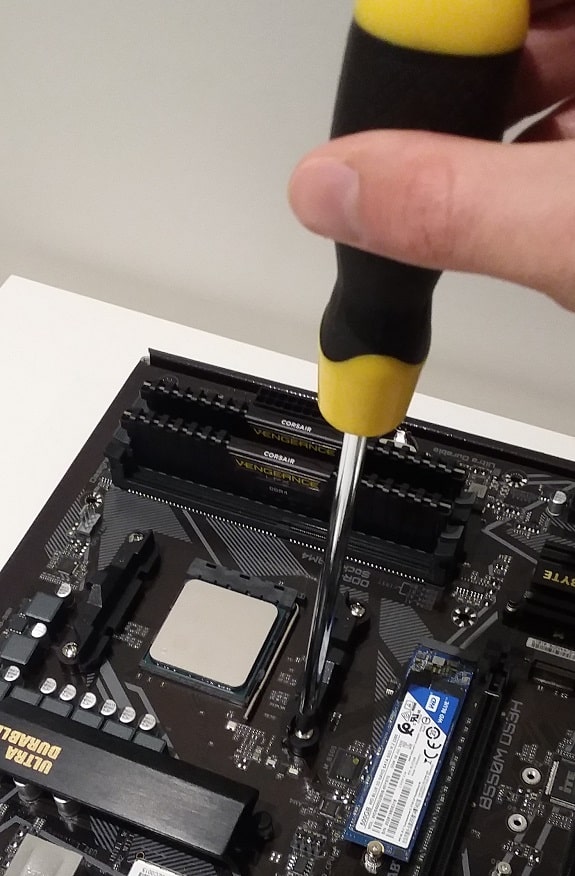
To remove the AMD mounting brackets, simply unscrew the 4 screws using a screwdriver:
You need to keep the rear backplate though, so once you've removed the 2 mounting brackets keep the backplate and the 4 corners of it poking through the motherboard so that your setup looks like this:
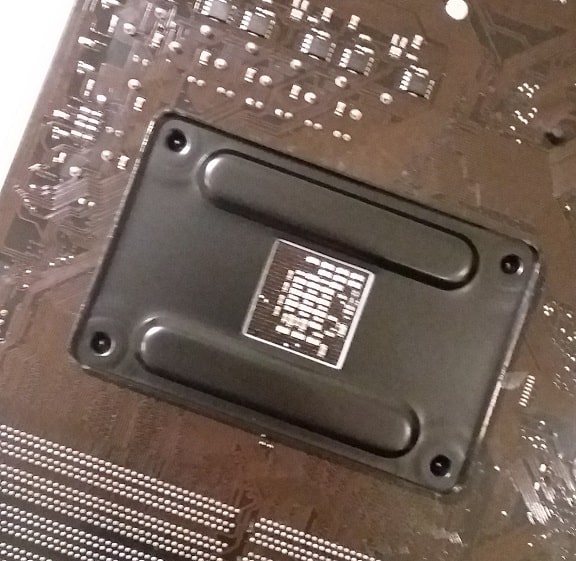 Keep the rear backplate in place
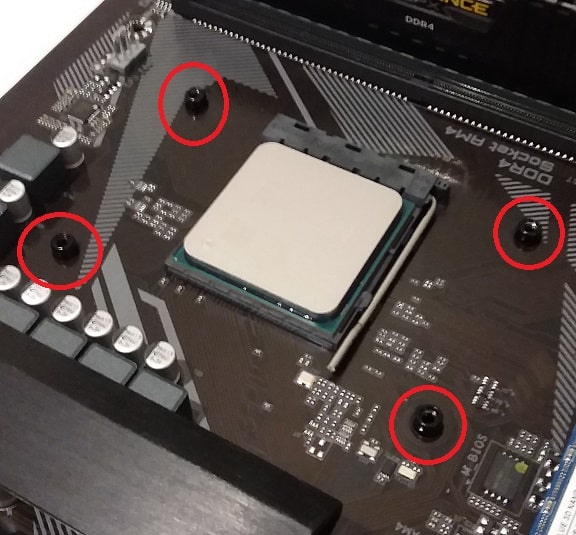 The 4 corners of the backplate must poke through the motherboard
3. Mount Wraith Stealth Onto Motherboard
Now it's time for the actual installation of the AMD stock cooler. Grab the Wraith Stealth cooler, and hold it by its sides. Make sure not to touch the pre-applied thermal paste on the bottom when handling it. Carefully lower it onto the CPU by aligning each of the 4 corners of the cooler onto the 4 screws of the backplate.
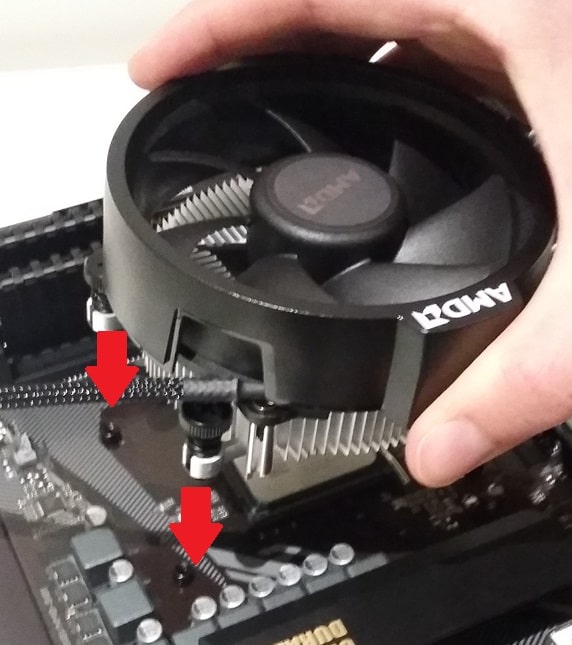 Place the cooler onto the 4 screws
When you have all 4 corners lined up, you need to progressively screw each corner of the cooler into the motherboard one at a time in a diagonal order. So what that means is, pick one corner to start with and only tighten it slightly (a half turn clockwise).
Enough so that it makes a connection with the screw on the motherboard (or more specifically the screw from the backplate). Then do the same for the corner diagonally opposite, so that you don't tighten the cooler in an unbalanced way (and risk it leaning to one side too much and potentially coming off as you try to mount it). Then do the same for a third corner (doesn't matter which one now), and then the last one.
Once you've done this half turn on each corner, go back to the first corner and do a full turn, and repeat in the same pattern for all corners. Then do a third pass, this time tightening the screws fully until you feel resistance and can't turn any more (do not force it - stop once you feel that resistance).
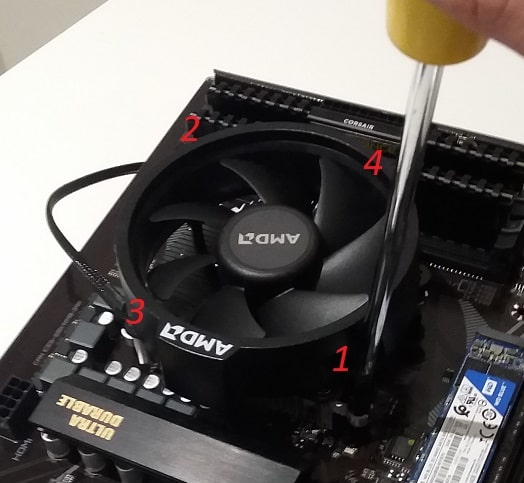 Tighten each corner a little at a time, and doing so in a diagonal order
Once you've tightened all 4 corners, you want to double check that the cooler is properly balanced and properly secured to the motherboard. You can do this by grabbing the cooler and carefully lifting up the motherboard from your table/work bench slightly. If the Wraith Stealth cooler is properly installed, there won't be any movement from the cooler and it will feel solidly attached to the motherboard as if it were actually part of it.
 Lift the motherboard by the cooler to see if it's securely attached, but be careful if you have a large and heavy motherboard
4. Connect Wraith Stealth Power Cable
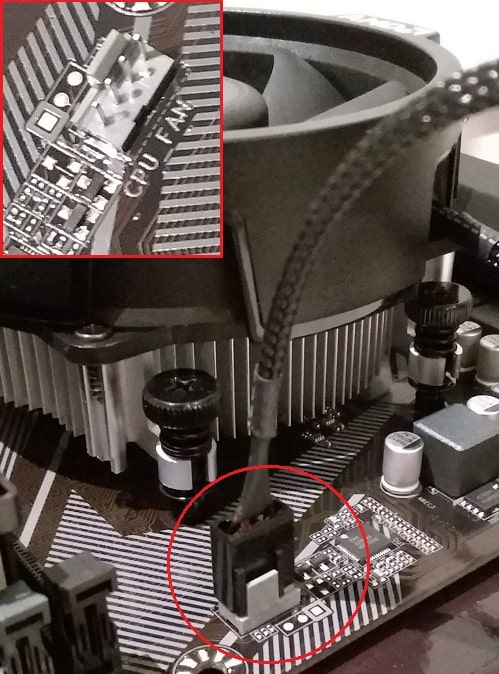
To finish the AMD stock cooler installation, all you need to do is plug in the fan cable to the CPU fan header on your motherboard. The header should be labelled "CPU_FAN" as shown below. If you can't find the header, refer to your motherboard manual.
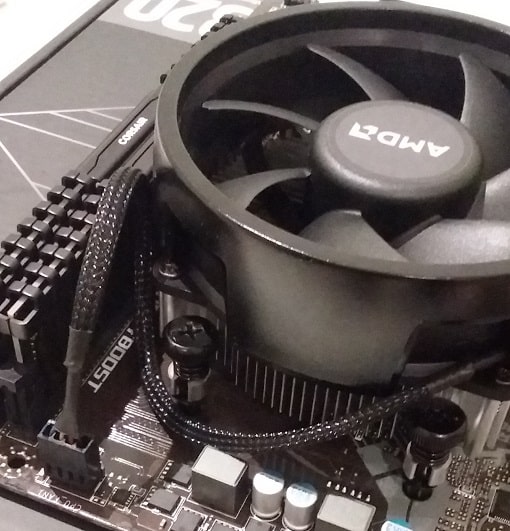
If your fan cable is loose and could get in the way of your fan or other components, try to tuck it away somewhere next to the cooler:
FAQ
Is the AMD Wraith Stealth a Good Cooler?
For mid-range CPUs, the Wraith Stealth cooler is more than adequate and typically performs well enough for most people.
However, if you plan to overclock your CPU, or you simply want the lowest temperatures and the least amount of noise, consider upgrading to a better third-party CPU cooler such as the Cooler Master Hyper 212 Black.
Or if you want the ultimate cooling performance and lowest noise in an air cooler, the Noctua NH-D15 is one of the best coolers on the market.
Which CPUs Come With the Wraith Stealth Cooler?
The following CPUs come included with the Wraith Stealth RGB LED cooler:
- AMD Ryzen 5 7600
- AMD Ryzen 7 5700G
- AMD Ryzen 5 5600X
- AMD Ryzen 5 5600G
- AMD Ryzen 5 3600
- AMD Ryzen 5 2600
- AMD Ryzen 5 2400G
- AMD Ryzen 5 1400
- AMD Ryzen 3 3300X
- AMD Ryzen 3 3200G
- AMD Ryzen 3 3100
- AMD Ryzen 3 2200G
- AMD Ryzen 3 1300X
- AMD Ryzen 3 1200
Source: AMD
Trusted VPN
VPN software can be important in this day and age, especially if you do lots of online banking and/or use public WiFi whilst travelling. Having a VPN adds an extra layer of security to your PC or laptop when online to help protect your data, passwords, financials, etc from hackers or malicious programs. It can also let you access region-locked content (eg US Netflix from overseas). For gamers their can be even more benefits to using a VPN.
Because they're so popular these days, there are countless VPN providers, and it can be confusing to pick one. If you want my 2 cents, after a lot of research I decided on NordVPN 'cause it's one of the fastest, most reliable VPNs for both gaming and general use, with a lot of credible reviews out there backing that up. They also quite often run very solid deals.
Popular Articles (see all)
Search the Site
About the Author (2025 Update)
I'm an indie game developer currently very deep in development on my first public release, a highly-immersive VR spy shooter set in a realistic near-future releasing on Steam when it's ready. The game is partly inspired by some of my favorites of all time including Perfect Dark, MGS1 and 2, HL2, Splinter Cell, KOTOR, and Deus Ex (also movies like SW1-6, The Matrix, Bladerunner, and 5th Element).
Researching, writing, and periodically updating this site helps a little with self-funding the game as I earn a few dollars here and there from Amazon's affiliate program (if you click an Amazon link on this site and buy something, I get a tiny cut of the total sale, at no extra cost to you).
Hope the site helps save you money or frustration when building a PC, and if you want to support the countless hours gone into creating and fine-tuning the many guides and tutorials on the site, besides using my Amazon links if purchasing something, sharing an article on socials or Reddit does help and is much appreciated.

