Home > PC Assembly > First Boot
How to Boot a PC for the First Time (Checklist)
Final Checks and Steps Before Turning On and Starting Your New Custom Computer
So you've successfully installed all your PC parts and think you're ready to boot your new PC build for the first time. However, if you want to make sure you've done all the required steps and completed everything that you need to do correctly for a stress-free, smooth and successful first boot, in this guide we'll quickly go over a basic checklist of steps to undertake before pressing that magical On button and starting-up your new computer for the first time. We'll also mention where to connect your peripherals and monitor.
Related: PC Build Troubleshooting Guide
1. Do a Quick Check of Component Connections
Before booting up your PC build for the first time, it's good practice to do a quick double check that all your components are still inserted all the way into their slots and firmly held in place via screws and/or their socket clips. It's unlikely, but during the installation of your motherboard into the case (or while you plugged power cables into the motherboard), something may have moved and become disconnected if it wasn't properly fitted.
Loose screws may lead to a component being loosed in its motherboard socket, so it's worth double checking now. Remember not to tighten screws too far; just turn them a fraction more than when they feel tight. Go ahead and check your CPU cooler, memory module/s, graphics card, any add-on cards such as a WiFi card or sound card that you installed to make sure everything is seated in properly and secure.
2. Check Front Panel Connections
As well as checking that everything is seated onto the motherboard properly and securely, I would also double check the front panel connections (the small cables attached to the front of your computer case which plugs into the motherboard). There is a chance something may have become loose as these front panel connections are quite small, or you may not have inserted them into the correct headers on the motherboard.
While you're at it, double check that all of your power supply cable connections are firmly plugged into place. If you connected your power supply cables a while back in the process, or you've since been digging into some cable management 'cause you know what's good for you (and your system), you might as well double check these connections to ensure all power cables are securely connected all the way in to your motherboard (and to any other components that require a direct connection from your PSU such as your graphics card).
3. Connect Monitor and Peripherals

Now it's time to connect your peripherals so that you can see what happens on-screen when you first boot-up. If you have a fairly recent keyboard and mouse, they will plug into USB ports; ideally you'll want to plug them in the back of your PC to keep your front USB ports available for other devices that you may be more frequently plugging in and out. Older keyboards and mice may still have a PS/2 connection, which are the circular green and blue ports on the rear of a motherboard.
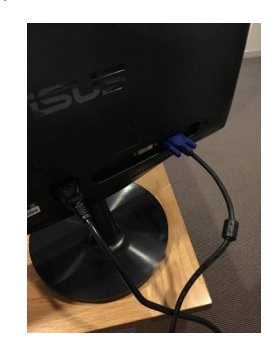
Depending on the monitor, you will either need just the video cable (whether it's HDMI, DVI, DisplayPort, or VGA) from the back of the monitor into the back of your graphics card (not your motherboard), or you'll need both a video cable and a dedicated power cable connection from the back of your monitor into a wall socket.
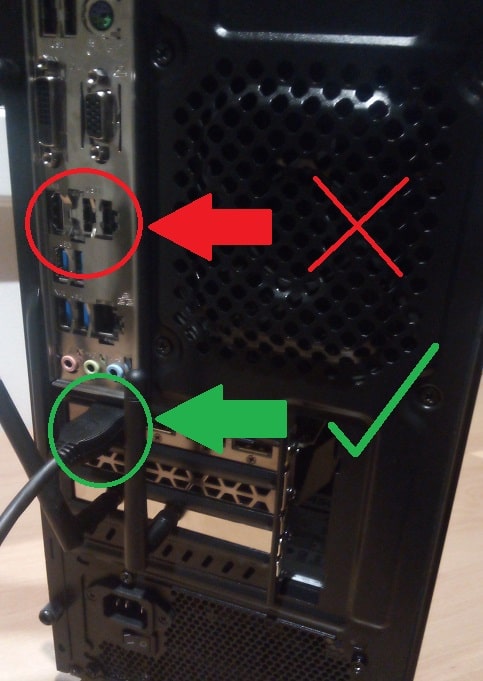
It's important to note that if you have a graphics card installed in your PC (and are not using integrated graphics from the CPU), you want to ensure that you plug your monitor directly into a port on the graphics card and NOT accidentally into a port on the motherboard. If you plug your monitor into the motherboard, you may not get a signal on the PC when you try to boot up. If you are using integrated graphics though (you have no graphics card), then you will connect the monitor to a motherboard port (eg HDMI).
 If you have a GPU, connect the monitor directly to one of its rear input ports (and NOT to a motherboard port)
If you have a set of gaming speakers or are using a headset/headphones for audio instead, you can plug these in now if you want to, though it's not necessary for a first-boot and for finishing your PC setup. Same with your network connection; it's not necessary to finish installation, but if you have an Ethernet cable to connect, might as well do it now so go ahead and plug it into the back of your PC and then the other end into your router or modem. If you're using a wireless dongle for WiFi instead, plug that into the back of your PC in a USB port.
4. Plug Power Supply to Wall (& Turn On)
Replace your case's rear side panel if you haven't already done so. However, keep the main side panel off for the time being so you can see what's going on when you boot-up in the next step.
Then plug in the main power cable of your power supply to a wall socket (ideally into a surge protector of some sort if you have one), and turn the power on at the wall.
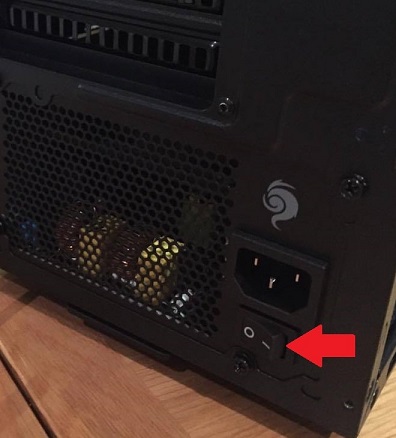
Now, turn on the switch on the back of your power supply, and turn on your monitor.
 Don't forget your power supply has an On switch on the back!
5. Press Power-On Button (On Front of Case)
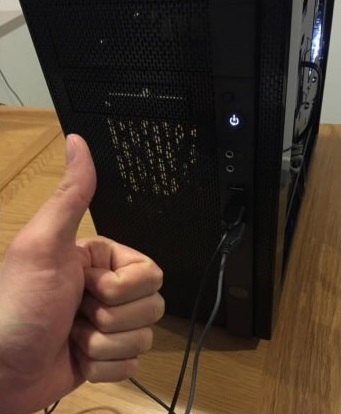
You now have everything ready to go, so it's time to cross fingers, pray to the skies, and press that scary On button on the front of your case.
If you've done everything correctly throughout the PC building process, which you should have if you followed a complete step by step guide like ours, you should now hear your case fans start up (hopefully only lightly because nobody likes a loud system), and you should also see a light on your PC and on your motherboard (some boards may not have a light though).
Something should show up on your monitor, too (make sure the monitor is turned on). Look inside your case to check that your case fans and the CPU fan is spinning. Keep in mind that your graphics card fan/s may not spin unless they're under load, so don't worry if there's no sign of life in that department.
 If you hear the relieving whirl of fans and see lights (minus any explosions) - it's mission accomplished!
If everything seems to be working, replace your side panel as you shouldn't run your PC without both panels in place for too long as it affects airflow. More importantly, high five yourself or the nearest cat/dog/dude/dudette because you've now successfully built your first PC and ascended to rank of Jedi.
Once you successfully do a first boot of your computer and all seems well, it's time to wade into the notorious waters of the BIOS and install your operating system software. Don't worry, it's actually easy. Or if you can't manage to boot up the PC, keep on reading the rest of this article before heading over to the BIOS setup guide.
Next: Setup BIOS and Software
No Response from PC? Here's What to Do
If there's no response when you turn on your PC, or something seems to be wrong, you're going to have to track back over your steps to see whether you missed something, didn't connect something properly, or to find another issue. Worst case is that a component isn't working and you can simply return it for a replacement, which really isn't that bad and does happen sometimes.
Don't get down on yourself or stress out if your new computer doesn't turn on, as it could be something very simple that you either missed or that you can quickly rectify, and you should be up and running in no time to claim that Jedi status.
We won't leave you hanging: see the troubleshooting new PC builds guide to learn how to find and fix common first-boot problems.
Trusted VPN
VPN software can be important in this day and age, especially if you do lots of online banking and/or use public WiFi whilst travelling. Having a VPN adds an extra layer of security to your PC or laptop when online to help protect your data, passwords, financials, etc from hackers or malicious programs. It can also let you access region-locked content (eg US Netflix from overseas). For gamers their can be even more benefits to using a VPN.
Because they're so popular these days, there are countless VPN providers, and it can be confusing to pick one. If you want my 2 cents, after a lot of research I decided on NordVPN 'cause it's one of the fastest, most reliable VPNs for both gaming and general use, with a lot of credible reviews out there backing that up. They also quite often run very solid deals.
Popular Articles (see all)
Search the Site
About the Author (2025 Update)
I'm an indie game developer currently very deep in development on my first public release, a highly-immersive VR spy shooter set in a realistic near-future releasing on Steam when it's ready. The game is partly inspired by some of my favorites of all time including Perfect Dark, MGS1 and 2, HL2, Splinter Cell, KOTOR, and Deus Ex (also movies like SW1-6, The Matrix, Bladerunner, and 5th Element).
Researching, writing, and periodically updating this site helps a little with self-funding the game as I earn a few dollars here and there from Amazon's affiliate program (if you click an Amazon link on this site and buy something, I get a tiny cut of the total sale, at no extra cost to you).
Hope the site helps save you money or frustration when building a PC, and if you want to support the countless hours gone into creating and fine-tuning the many guides and tutorials on the site, besides using my Amazon links if purchasing something, sharing an article on socials or Reddit does help and is much appreciated.

