Home > PC Assembly > Troubleshooting
Troubleshooting a New PC Build Step by Step
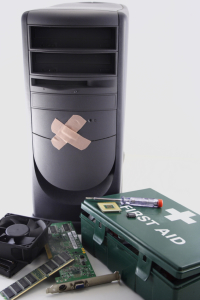
How to Find and Fix Common Computer Build Errors or Problems (What to Do if PC Doesn't Boot or Display Shows a Blank Screen) + Motherboard Diagnosis & Beep Codes Explained
Last Updated: March 26, 2023
This guide is dedicated to finding and fixing any problems you have with starting or booting up your new custom PC build. Hopefully you actually won't have to refer to this troubleshooting guide, because if you've followed all the instructions in our gaming PC build walkthrough tutorial you should have booted up properly without any issues, so if that's the case, you can ignore this article exists.
But if you did encounter a problem with booting your PC for the first time, such as your new PC build not turning on at all, your system powering on but not starting up (ie no display), your motherboard making strange beeping noises, or other problems, fear not as this simplified guide will take you step by step through common issues and how to solve them.
But firstly, if your new PC doesn't start or show a display, remember to stay calm and don't freak out as it's usually something really simple that you may have done incorrectly or simply forgot to do. Plus, in the rare situation that one of your new PC components used in your custom computer is damaged or dead, you can simply return them as new PC parts comes with a warranty. Even refurbished PC parts should have a warranty as well.
PC Not Powering On After Building
If you've finished building your PC and nothing happens when you press the power button on your computer case (no fans turn on, no lights turn on, and you don't hear any noise) then start with the following steps:
Step 1: Check the Main Power Connection
First things first; did you accidentally forget to plug in the power cable from the back of your power supply to a wall socket AND turn on the switch at the wall? Also check that the wall socket is actually working by plugging in another device to that socket to check it's giving out power.
Step 2: Check the PSU Switch
This is something first-timers actually forget more than you'd think; have you turned on the switch on the back of your computer case (specifically, the switch on the back of your power supply)? The switch should be marked with a “0” and “1”, so make sure the “1” side is pressed down which means it's on.
Step 3: Check Motherboard Power Connections
You'll want to now go back inside of your computer, remembering to ground yourself first as explained in our full computer building tutorial, and triple check the power connections from your power supply to the motherboard are fitted to the right sockets and are plugged all the way in. There is the 20+4 main motherboard connector and the 4+4 processor connector to check, as explained in the power supply cables guide.
Step 4: Check Motherboard Front Panel Connections
Triple check you've plugged the computer front panel connections into the proper sockets on the motherboard, and that they're plugged in all the way. Especially the connection for the power-on switch on the front of your case.
Consult your motherboard manual to be 100% sure you've got them in the right place, and it's also a good idea to check that these connections are also firmly connected to the switches on the front of your case. Remove your case's front panel to get a better look.
Step 5: Check the Motherboard Installation Into Case
It's possible your motherboard may not be grounded properly. Check that your motherboard is properly mounted onto the motherboard standoffs, and that those standoffs are properly screwed into the case.
Also check the motherboard screws are tight enough while you're at it (they don't need to be too tight though, in fact we advise against that).
Step 6: Test Your Power Supply
If none of the above works, try and use another power supply in your PC (of equal or greater wattage to the one you used for your PC build) if you have access to one from either an older PC or from a friend's PC. Getting a dead power supply is rare, but it could happen.
To test your power supply you could buy a power supply tester which doesn't cost much, but make sure it's at least a fairly reliable one as there is the odd chance you'll get a false positive reading. You could take your PSU into a local PC or electronics store as they may be able to test it for you on the spot (either for a small fee or for free if you smile and wave your hands like a Jedi).
There are also DIY methods to test your PSU but they aren't recommended unless you really know what you're doing as it involves a little bit of mucking around with the wiring and could be a little dangerous when not done properly. If you're a novice you should leave this to a professional. If you do test your PSU and it comes back as working fine, your motherboard could be dead instead.
PC Powering On But No Display / No Startup
If when you turn your custom PC on you have power (you see the light on your case and motherboard and hear the fans running) but your PC doesn't boot-up and shows nothing on your monitor, follow these troubleshooting steps:
Step 1: Check Monitor Connections
First thing to do is check that your monitor is properly plugged into the back of your graphics card nice and firmly, and that the monitor cable is plugged in properly and switched on at the wall if your monitor does in fact require its own power. Also check that you've switched the on button on your actual monitor.
If you have a discrete/dedicated graphics card in your PC build, you need to make sure the monitor is plugged into the back of the card and not into the back of your motherboard (motherboards have display inputs as well for anyone who uses integrated graphics on the CPU). This is a common issue that people have when their PC powers on but has no display - they accidentally plugged the monitor cable into the back of the motherboard instead of into the back of the graphics card.
Step 2: Check Motherboard Connections
Go through the steps above from the previous section to check all of your motherboard power connections and your motherboard installation.
Also check your SATA power connections from the power supply to your drives, including the data transfer SATA cables.
Step 3: Check Your PSU Requirements
This shouldn't be an issue as you should have chosen a PSU (Power Supply Unit) that can handle your PC components, but worse mistakes have been made; check that your power supply has enough watts to more than cover all of the components connected in your system. If your PSU doesn't have enough power it may automatically shut down after you try to turn it on.
Step 4: Check CPU Cooler Connection
Check that your CPU cooler is installed properly and making full contact with the top of the CPU. If your system doesn't detect the cooler as being attached properly to the top of the CPU, it may shut itself down as it's dangerous to run a CPU without a working cooler.
Step 5: Check Your Other Components
If you're still not getting anywhere, go ahead and check all of your remaining components including RAM, graphics card, and CPU, to make sure they're properly installed. Go over the corresponding sections in our PC building guide and re-do those connections, or try removing one component at a time until your system does boot-up (except the CPU - re-installing the CPU is a last resort). This could narrow down your problem to a faulty component.
If you've carefully gone through everything above to no avail, including the steps from the first section of this troubleshooting guide, continue on to the Beep Codes section further below which could help you find the problem.
PC Starts But Then Shuts Down
If your PC starts up but then soon after shuts down itself, a common cause of this is an improperly seated or connected CPU cooler. If the CPU cooler isn't fully seated onto the top of your CPU, or if the CPU cooler fan cable isn't connected properly (or is broken), the CPU can overheat very quickly and so your system will automatically shut down as a precaution. Check that your CPU cooler is properly installed.
PC Starts But Power Cycles On/Off
If when you turn your system on it repeatedly powers on and off and continues in this cycle without you doing anything, this could be a sign your motherboard is faulty. Or, it could be your power supply, so refer to the section on testing your PSU earlier. But firstly I would check that your RAM modules are properly seated into the motherboard, and if it still keeps power cycling I would check that the CPU is seated all the way into the CPU socket properly.
This problem could also be caused if you're using an older PSU with newer components where the current generation parts require higher start-up currents than the older PSU can handle. So if you perhaps used an older power supply in your PC build, that is a red flag and you may have to replace the PSU.
All that said, before jumping to conclusions about it being your motherboard or PSU, I would go over the general steps from the first section of this troubleshooting guide first to see if any of that solves the issue. Specifically you want to check all wire/cable connections to make sure everything is seated/plugged properly, including the CPU cooler. You might as well go through the beep codes section below too to see if you can pinpoint the issue.
If nothing seems to work and your PC keeps power cycling on and off, I would then try to get your hands on another power supply and test that to see if it works. Lastly, failing everything else, you may have to replace the motherboard.
PC Build Troubleshooting Using the Motherboard
One way to narrow down an issue with your first-boot is by diagnosing your motherboard. There are two ways you can do this. Firstly, check if your motherboard has a small LCD diagnostic screen on its rear panel. This isn't likely on most motherboards, but some of the more feature-rich boards will have this handy feature.
The LCD screen will display error codes when you try to boot-up, which you can look up in the motherboard manual or on the manufacturer's website. Your board may also have diagnostic LED lights which show a pattern that you can also check against the manual or website in order to pinpoint the issue.
Motherboard Beep Codes
The second way to diagnose what's wrong with your system using your motherboard is by using what's called a post speaker, which you'll need to get separately as they don't ship with most motherboards these days (they used to). What you do is attach this little speaker to the front header panel contacts on your board, and it emits a beeping sound when you try to boot-up. Check your motherboard manual on help setting it up for your particular board.
You should only go out of your way to get a post speaker if you've done all the other checks in this guide to troubleshooting a PC build. Alternatively, you could bring your motherboard to a local store for help with this, or ask a PC expert or friend who will have one available.
Once you have a post speaker attached to your motherboard, anything other than the one single beep after you turn on your system means there is something wrong. Different types and lengths of beeps mean different things to different boards, so you'll need to check the beep/s you get against your specific motherboard's manual or website. Alternatively, give your manufacturer a call to get to the bottom of the beeping. The following guides may also help:
How to Get Further Help
Going through all of the above steps to troubleshooting your new PC build, including going over the main PC installation steps again to make sure you’ve done it right, should weed out most first-boot problems. But if you're still having issues with booting up your first computer properly, here are some things you can do:
- Research around on Google for a solution as somebody will no doubt have experienced your issue before. Try to be as specific as possible in your searches to pinpoint someone with the exact same problem.
- Post on a good hardware forum/community such as Reddit (Build a PC or Tech Support), but just make sure you've tried many things yourself first and gave it a real go before starting a new thread, and read the rules before posting.
- Check out this other PC build troubleshooting guide that includes images too and may help further.
- Ask a friend or family member who knows computers well to have a look over your build and try their hand at fixing your little dilemma, or pay a professional to come around and pray they don't charge you an arm and a leg.
Good luck, and like mentioned there's logically not much reason to stress out as usually the issue will be solved after doing a few checks and re-installing things, or perhaps you got a faulty part in which case you can simply return it for another one.
Trusted VPN
VPN software can be important in this day and age, especially if you do lots of online banking and/or use public WiFi whilst travelling. Having a VPN adds an extra layer of security to your PC or laptop when online to help protect your data, passwords, financials, etc from hackers or malicious programs. It can also let you access region-locked content (eg US Netflix from overseas). For gamers their can be even more benefits to using a VPN.
Because they're so popular these days, there are countless VPN providers, and it can be confusing to pick one. If you want my 2 cents, after a lot of research I decided on NordVPN 'cause it's one of the fastest, most reliable VPNs for both gaming and general use, with a lot of credible reviews out there backing that up. They also quite often run very solid deals.
Popular Articles (see all)
Search the Site
About the Author (2025 Update)
I'm an indie game developer currently very deep in development on my first public release, a highly-immersive VR spy shooter set in a realistic near-future releasing on Steam when it's ready. The game is partly inspired by some of my favorites of all time including Perfect Dark, MGS1 and 2, HL2, Splinter Cell, KOTOR, and Deus Ex (also movies like SW1-6, The Matrix, Bladerunner, and 5th Element).
Researching, writing, and periodically updating this site helps a little with self-funding the game as I earn a few dollars here and there from Amazon's affiliate program (if you click an Amazon link on this site and buy something, I get a tiny cut of the total sale, at no extra cost to you).
Hope the site helps save you money or frustration when building a PC, and if you want to support the countless hours gone into creating and fine-tuning the many guides and tutorials on the site, besides using my Amazon links if purchasing something, sharing an article on socials or Reddit does help and is much appreciated.

|
ABOUT BGC Helping you build better systems for less, here at Build-Gaming-Computers.com you'll find simultaneously comprehensive yet simplified guides and tutorials, including continuously updated PC build examples. Always as objective and unbiased as possible with product recommendations, and with little to no ads. |
Intro | Best PC Builds | Best Cases | PC Assembly | Prebuilt PCs | PSU Guide | VR Headsets | Privacy | Contact | Donate | Archives

Copyright (C) 2006-2025 Build-Gaming-Computers dot com All Rights Reserved
As an Amazon Associate we earn from qualifying purchases
For the Love of Gaming + Flawless Frame Rates