Home > PC Assembly > Install Intel Cooler
How to Install the Intel Stock Cooler for LGA 1700 Motherboards (12th/13th Gen CPUs)
Intel's 'Laminar RM1' Cooler is a Nice Improvement Over Previous Intel Stock Coolers

Last Updated: January 31, 2023
In this beginner-friendly tutorial we'll cover how to install the Intel stock cooler for LGA 1700 motherboards step by step with clear, easy to understand instructions and photos. Specifically, we show how to install the Intel Laminar RM1 cooler, which comes included with any non-K CPU (models without a 'K' in the model name) from Intel's 12th generation and 13th generation series of Intel Core i3, Core i5, and Core i7 processors (non-K i9 processors come with a different, slightly beefier Intel Laminar RH1 cooler). Installation of this latest Intel stock cooler is quite straightforward overall, and for most people will not take long to install.
Related: How to Install AMD AM4 Stock Cooler
The following Intel processors come with the Laminar RM1 cooler:
12th-gen Intel CPUs: i7-12700, i7-12700F, i5-12600, i5-12500, i5-12400, i5-12400F, i3-12100 and i3-12100F.
13th-gen Intel CPUs: i7-13700, i7-13700F, i5-13500, i5-13400, i5-13400F, i3-13100, i3- and i3-13100F.
1. Ensure CPU is Ready for Cooler Installation
Before installing the cooler, make sure your 12th or 13th generation Intel processor is installed on your LGA 1700 motherboard, and that the motherboard's metal lever/arm is down and locked into place underneath the metal clip found on the side of the CPU socket:
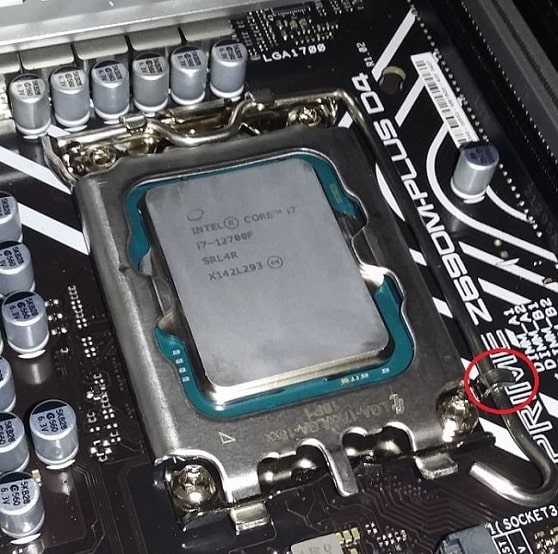 Circled is the clip where the metal lever must be tucked into
When installing a stock Intel cooler, there's no need to apply thermal paste on the CPU as stock Intel coolers should already have thermal paste pre-applied to the bottom.
2. Locate CPU Fan Header to Plan Cooler Orientation
The Intel stock cooler can be oriented in any way, as it is a square design with all 4 corners being the same length apart. Before installing it, it's not required but good practice (at least in my opinion and experience) to first locate the CPU fan header (connection) on your motherboard which will be labelled something along the lines of 'CPU_FAN' (printed on the actual board itself). If in doubt check your motherboard manual to find where it is. You want to locate this ahead of installing the Intel cooler so that you can orient the cooler the most optimal way around.
Grab your cooler - hold it by the sides and don't touch the bottom where the pre-applied paste is or you can smudge it everywhere. Simply hover the cooler over the CPU socket without touching the top of the CPU (which would smudge the paste) to get a sense of the most optimal orientation/positioning to ensure that the fan cable (the cable attached to the cooler) will actually reach the CPU fan header on the motherboard, AND optionally to also ensure that you can neatly tuck away the fan cable to the side somewhere so that it doesn't end up hovering over the cooler's fan (which wouldn't be the worst thing but would look a little messy and could also fall and get stuck in the fan in future).
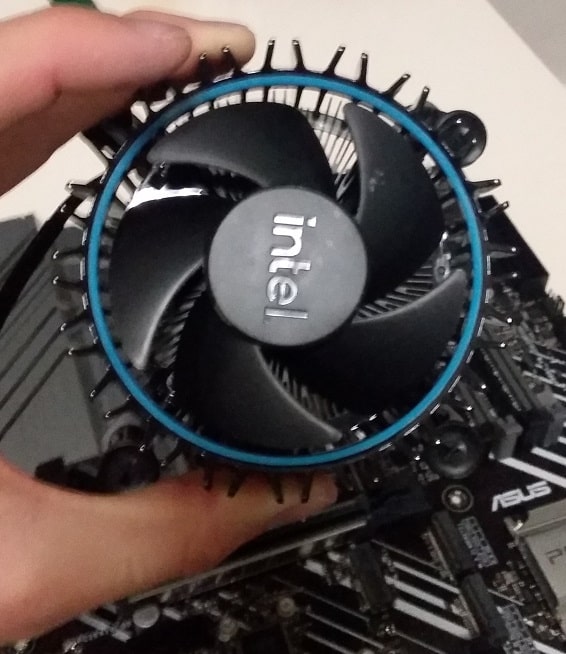 Hover the cooler over the CPU socket to plan which way to mount it
If you position/orient the cooler in a way where the fan cable is right near the fan header on the motherboard, there is more cabling you need to manage (ie to tuck away neatly somewhere). Whereas if you orient the cooler so that the fan cable is a little away from the fan header (yet not so far away that you would need to pass the cable over the fan itself to reach the header), once you've connected the fan cable there will be less "excess" cable to have to manage and tuck away.
3. Mount and Secure the Cooler Onto Motherboard
When you know which way you're going to orient the Intel stock cooler onto your motherboard (to best accomodate the fan cable), it's time to install the cooler.
Look for the 4 holes surrounding the CPU socket on the motherboard, and, while holding the cooler by its sides (not from the bottom where the pre-applied paste is), lower the 4 pegs of the cooler into the 4 holes. The Intel logo on the cooler should be facing up, and the pre-applied paste on the cooler should be facing down (and making contact with the CPU).
Slightly wiggle the cooler around to check that all 4 pegs have aligned correctly and are slightly poking through the 4 holes on the motherboard. If the cooler doesn't slide out of place (out of the holes) when you gently wiggle it then it should be in place and ready to be secured.
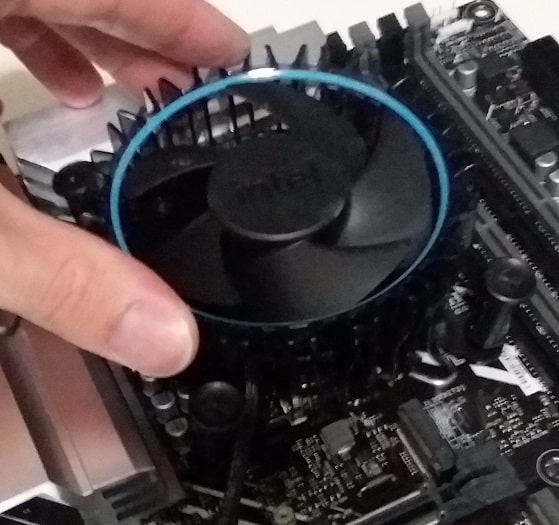 First, simply place the cooler on top of the CPU by aligning the 4 holes on each corner
To go ahead and secure the cooler, you need to push all of the 4 pegs of the cooler down (one at a time) until you hear a clicking noise which indicates that the peg has been properly secured to the motherboard.
It's important that you secure each peg in a diagonal order so that the cooler doesn't become lopsided during this process (which would make securing the other pegs harder or even impossible). In other words, while using one hand to put a little downwards pressure on the middle of the cooler (so that it remains in place and doesn't slide off), start with any peg and push it into place until you hear the click, and then make sure to next secure the peg opposite that peg next (as in, not the peg next to it, but the one opposite it in a diagonal direction).
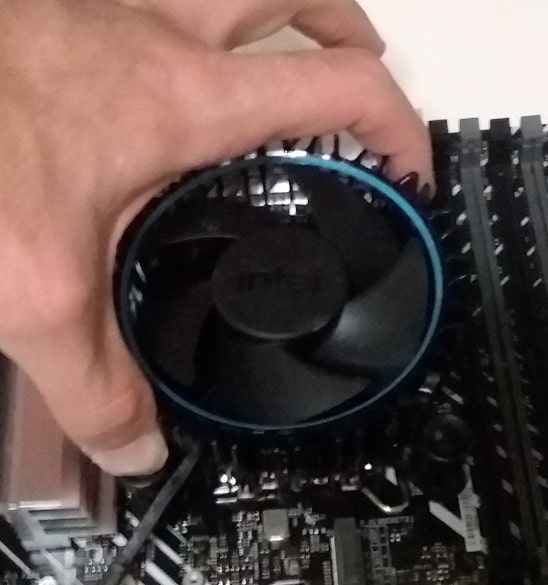 I pushed the bottom left peg in first, then the top right peg.
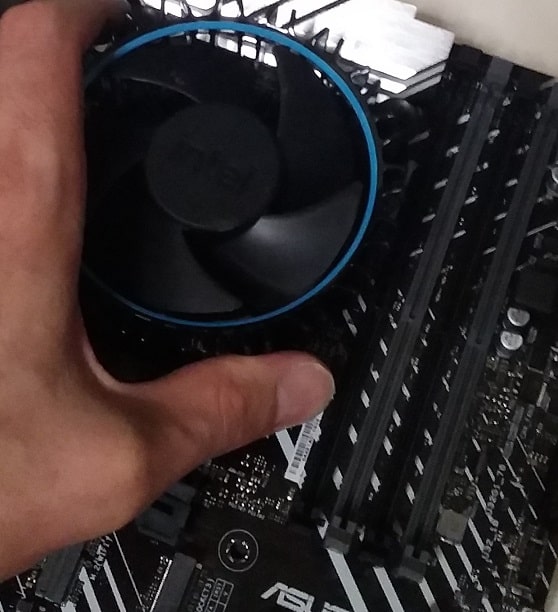 Pushing the last 2 pegs to fully secure the cooler
It may take a little wiggling around of the cooler to get all 4 pegs done (to keep the cooler correctly aligned with the 4 holes on the board). Once all 4 pegs have clicked in, check to see the cooler is firmly secured to the motherboard by trying to slide the cooler from side to side. If it doesn't move, you're good to go.
4. Connect Fan Cable to Fan Header
Now simply connect the fan cable into the fan header on the motherboard labelled as "CPU_FAN" or something along those lines as mentioned earlier. You could technically use a chassis fan header instead (which are used to connect case fans), but it's good practice to use the dedicated CPU fan header.
Also try and neatly tuck away the cable somewhere on the side of the cooler if you can - perhaps between the cooler and a heatsink nearby. You don't have to overthink this - just put the cable in a position that is out of the way of the cooler's fan and/or that looks good to you. And with that, your 12th gen Intel cooler is installed.
When you boot your computer build, the cooler fan should start spinning, and to further confirm your cooler is properly installed and making proper contact with the CPU (and that the paste is doing its job to transfer heat), you can check your CPU temperature in the BIOS to ensure its within a normal range.
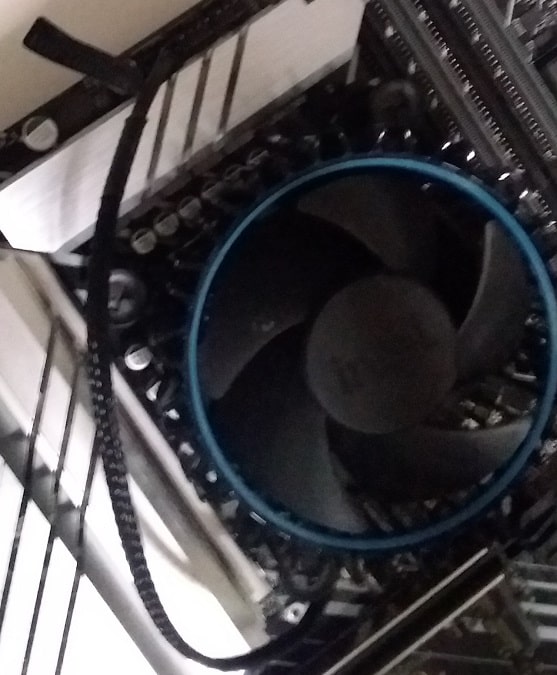 Connect the fan cable, then try to tuck away the cable on the side somewhere if you can
Related Articles:
- How to Install Stock AMD Cooler
- How to Install AMD Wraith Prism Cooler
- How to Install the CM Hyper 212 RGB Black
- How to Install the Noctua NH-D15 Black
- How to Apply Thermal Paste on a CPU
- How to Overclock a CPU for Beginners
Trusted VPN
VPN software can be important in this day and age, especially if you do lots of online banking and/or use public WiFi whilst travelling. Having a VPN adds an extra layer of security to your PC or laptop when online to help protect your data, passwords, financials, etc from hackers or malicious programs. It can also let you access region-locked content (eg US Netflix from overseas). For gamers their can be even more benefits to using a VPN.
Because they're so popular these days, there are countless VPN providers, and it can be confusing to pick one. If you want my 2 cents, after a lot of research I decided on NordVPN 'cause it's one of the fastest, most reliable VPNs for both gaming and general use, with a lot of credible reviews out there backing that up. They also quite often run very solid deals.
Popular Articles (see all)
Search the Site
About the Author (2025 Update)
I'm an indie game developer currently very deep in development on my first public release, a highly-immersive VR spy shooter set in a realistic near-future releasing on Steam when it's ready. The game is partly inspired by some of my favorites of all time including Perfect Dark, MGS1 and 2, HL2, Splinter Cell, KOTOR, and Deus Ex (also movies like SW1-6, The Matrix, Bladerunner, and 5th Element).
Researching, writing, and periodically updating this site helps a little with self-funding the game as I earn a few dollars here and there from Amazon's affiliate program (if you click an Amazon link on this site and buy something, I get a tiny cut of the total sale, at no extra cost to you).
Hope the site helps save you money or frustration when building a PC, and if you want to support the countless hours gone into creating and fine-tuning the many guides and tutorials on the site, besides using my Amazon links if purchasing something, sharing an article on socials or Reddit does help and is much appreciated.

|
ABOUT BGC Helping you build better systems for less, here at Build-Gaming-Computers.com you'll find simultaneously comprehensive yet simplified guides and tutorials, including continuously updated PC build examples. Always as objective and unbiased as possible with product recommendations, and with little to no ads. |
Intro | Best PC Builds | Best Cases | PC Assembly | Prebuilt PCs | PSU Guide | VR Headsets | Privacy | Contact | Donate | Archives

Copyright (C) 2006-2025 Build-Gaming-Computers dot com All Rights Reserved
As an Amazon Associate we earn from qualifying purchases
For the Love of Gaming + Flawless Frame Rates